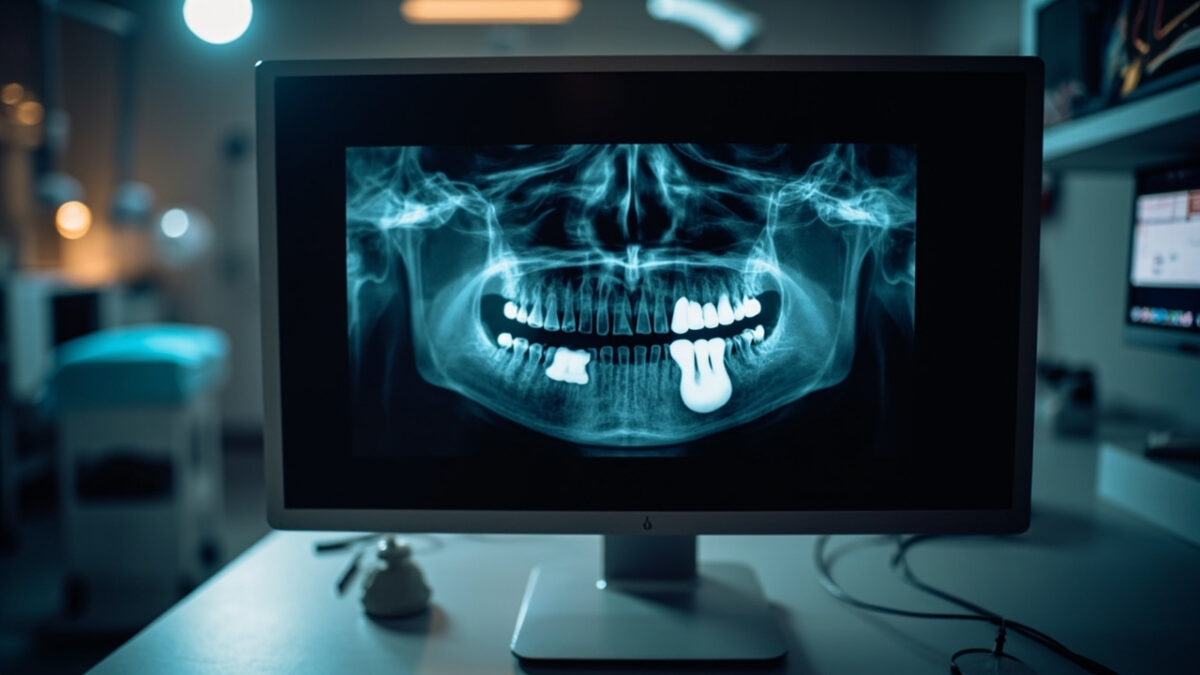
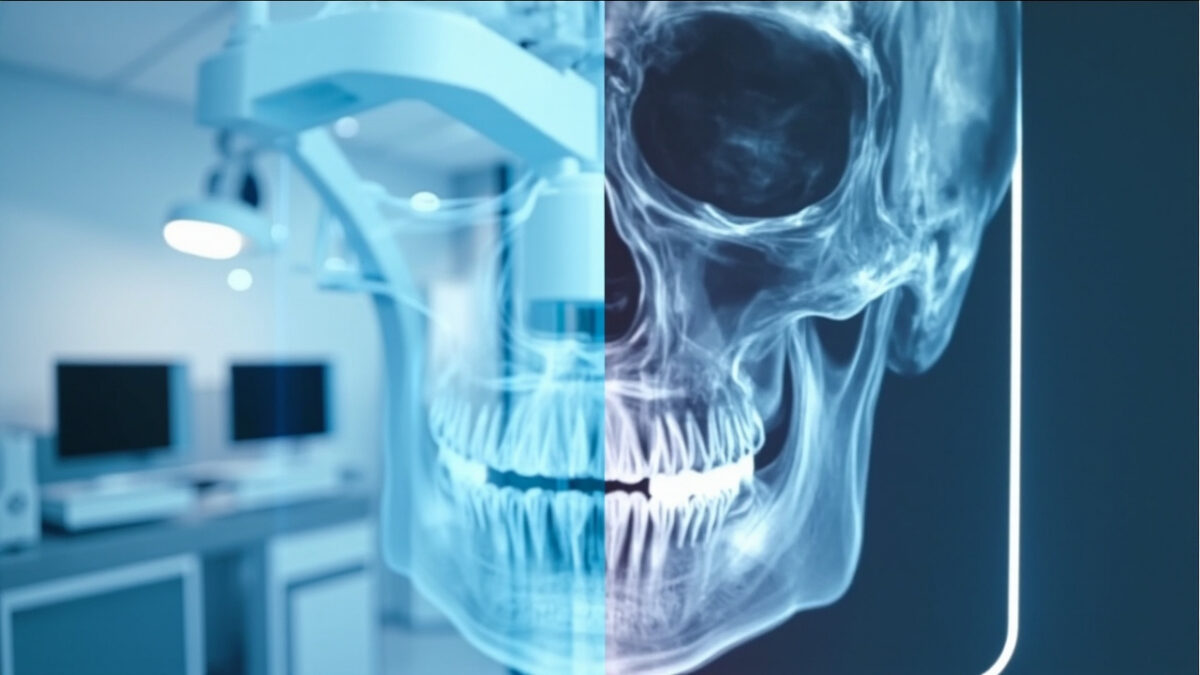
Radiation Safety Compliance: What Every Dental Office Needs to Know

Radiation safety in the dental office is not optional — it is a legal requirement, an ethical obligation, and a cornerstone of professional practice. Whether your office operates a single intraoral X-ray unit or a full imaging suite with panoramic and CBCT capabilities, compliance with radiation safety regulations protects your patients, your staff, and your practice. This article outlines the essential elements of a dental radiation safety program and the compliance standards every office should meet.

The Regulatory Landscape

In the United States, dental X-ray equipment and radiation safety are regulated at both the federal and state levels. The Food and Drug Administration (FDA) sets performance standards for X-ray equipment manufacturing, while individual state radiation control programs regulate the registration, inspection, and use of X-ray equipment in dental practices.

Requirements vary significantly from state to state. Some states require periodic inspections of dental X-ray equipment, while others rely on self-certification. Some mandate specific training hours for dental auxiliaries who operate X-ray equipment, while others defer to the supervising dentist. It is each practice’s responsibility to know and comply with the regulations in their jurisdiction.

The ALARA Principle

The ALARA principle — As Low As Reasonably Achievable — is the guiding philosophy of radiation protection. It means that every reasonable effort should be made to minimize radiation exposure to patients and staff, even when doses are already below regulatory limits. ALARA is not just a suggestion; it is a regulatory expectation embedded in radiation protection standards worldwide.

Applying ALARA in dental practice involves three strategies: minimizing exposure time, maximizing distance from the radiation source, and using appropriate shielding.

Patient Protection Measures

Protecting patients from unnecessary radiation begins before the X-ray unit is turned on. The most important patient protection measure is clinical justification — every X-ray exposure must be based on an individual assessment of the patient’s clinical needs. Routine X-ray imaging based solely on time intervals (such as “bitewings every six months for all patients”) without clinical justification does not meet current standards of care.

Selection Criteria

The ADA and FDA jointly published selection criteria guidelines that recommend radiographic examinations based on the patient’s age, clinical signs, symptoms, and risk factors — not arbitrary schedules. Familiarize your team with these guidelines and apply them consistently.

Thyroid Collars and Lead Aprons

The use of thyroid collars during intraoral X-ray exposures is strongly recommended, as the thyroid gland is radiosensitive and often lies within or near the primary beam path. Lead or lead-equivalent aprons provide additional protection for the patient’s torso, though their necessity is debated for properly collimated modern equipment. When in doubt, use both — the cost is negligible and the patient perception of safety matters.

Note that thyroid collars should not be used during panoramic X-ray exposures, as they interfere with the image by blocking the X-ray beam path.

Rectangular Collimation

Rectangular collimation reduces the X-ray beam to approximately the size of the sensor or film, dramatically reducing the volume of tissue irradiated compared to the standard round PID. Studies have shown that rectangular collimation can reduce patient dose by up to 60% compared to round collimation. If your practice is not using rectangular collimation for intraoral X-ray imaging, this is one of the single most impactful changes you can make.

Fast Image Receptors

Digital sensors and PSP plates require significantly less radiation than traditional D-speed film. If your practice still uses film, transitioning to digital imaging will reduce patient doses substantially while also improving workflow efficiency and image management.

Operator Protection

Dental X-ray operators must protect themselves from scatter and secondary radiation. The primary rules are straightforward:

  • Distance: Stand at least six feet from the X-ray source during exposure, or position yourself behind a protective barrier. Never hold the sensor or film in the patient’s mouth during exposure.
  • Position: Stand at a 90- to 135-degree angle to the primary beam direction. Never stand in the path of the primary beam or directly opposite it.
  • Shielding: Use structural shielding (walls with adequate lead equivalency) or a mobile barrier when the operatory layout does not allow sufficient distance.

Personnel Monitoring

While not universally required in dental settings, personnel dosimetry badges are recommended when operators work near CBCT equipment or in high-volume imaging environments. Dosimetry provides documented evidence that occupational exposures remain within regulatory limits and helps identify any unexpected exposure patterns early.

Equipment Requirements

Dental X-ray equipment must meet specific performance standards to be legally operated. Key requirements include:

  • Minimum filtration: X-ray units operating above 70 kVp must have a minimum total filtration of 2.5 mm aluminum equivalent to filter out low-energy photons that contribute to patient dose without contributing to image formation.
  • Collimation: The beam must be restricted to the area of clinical interest. Round PIDs must limit the beam diameter to no more than 2.75 inches at the patient’s skin surface.
  • Timer accuracy: The exposure timer must terminate the exposure within acceptable accuracy limits. Electronic timers have largely replaced mechanical timers for this reason.
  • Kilovoltage: Intraoral units must operate at a minimum of 50 kVp (60–70 kVp is standard for most modern units).
  • Source-to-skin distance: A minimum source-to-skin distance of 8 inches for units operating above 50 kVp ensures adequate beam geometry.

Documentation and Record-Keeping

Maintaining thorough records is a fundamental component of radiation safety compliance. Essential documentation includes:

  • Equipment registration and inspection certificates
  • Quality assurance test results and maintenance logs
  • Staff training records and continuing education certificates
  • Written radiation safety policies and procedures
  • Personnel dosimetry reports (if applicable)
  • Patient exposure records (type, number, and clinical justification for each examination)

Staff Training

Every team member who operates X-ray equipment or assists during exposures should receive formal radiation safety training. Training should cover the biological effects of radiation, principles of radiation protection, proper equipment operation, patient and operator protection techniques, and emergency procedures. Many states require documented training before dental auxiliaries are permitted to expose X-ray images.

Refresher training should be conducted annually or whenever new equipment or protocols are introduced. Make radiation safety a standing agenda item in staff meetings to reinforce good habits and address any issues promptly.

Building a Culture of Safety

Compliance is more than checking boxes — it is about creating a practice culture where radiation safety is valued and practiced consistently. When every team member understands why these measures matter, compliance becomes second nature. Start with a written radiation safety manual, designate a radiation safety officer within the practice, and conduct regular audits to ensure that policies translate into daily practice. Your patients trust you with their health — radiation safety compliance is an essential part of honoring that trust.

Common Dental X-ray Artifacts and How to Troubleshoot Them

Even the most experienced dental professionals encounter image artifacts that compromise diagnostic quality. Whether you are working with traditional film, digital sensors, or phosphor storage plates (PSP), understanding the causes of common X-ray artifacts — and knowing how to correct them — is critical for accurate diagnosis and efficient workflow. This guide covers the most frequently encountered dental X-ray artifacts, their root causes, and practical troubleshooting steps.

What Are X-ray Artifacts?

An artifact is any feature that appears on a radiographic image that does not represent actual patient anatomy. Artifacts can mimic pathology, obscure important diagnostic information, or simply degrade image quality to the point where a retake is necessary. Every retake means additional radiation exposure for the patient and lost chair time for the practice, making artifact prevention a priority.

Patient Positioning Errors

Positioning errors are among the most common causes of artifacts in intraoral and panoramic X-ray imaging.

Cone Cutting

Cone cutting occurs when the X-ray beam is not properly aligned with the sensor or film, resulting in a clear unexposed area on the image. This is immediately recognizable as a sharp, curved border between the exposed and unexposed portions of the image.

Troubleshooting: Ensure the position-indicating device (PID) is properly aligned with the sensor holder. Using beam-alignment devices (such as XCP or Rinn holders) significantly reduces cone cutting. Take a moment to verify alignment before each exposure.

Elongation and Foreshortening

Elongation makes teeth appear longer than they actually are, while foreshortening makes them appear shorter. Both result from incorrect vertical angulation of the X-ray beam relative to the sensor and tooth.

Troubleshooting: Elongation occurs when the vertical angle is too shallow (insufficient angle). Foreshortening occurs when the angle is too steep. Using the paralleling technique with proper beam-alignment instruments helps maintain consistent and correct angulation.

Overlapping

Overlapping of interproximal surfaces makes it impossible to evaluate contact areas for caries — defeating the primary purpose of bitewing X-ray images.

Troubleshooting: Overlapping results from incorrect horizontal angulation. The central ray must be directed through the contact points perpendicular to the interproximal surfaces. Adjust the horizontal angle so the beam passes cleanly between the teeth of interest.

Panoramic X-ray Artifacts

Panoramic radiography introduces a unique set of positioning-related artifacts due to the rotational nature of image acquisition.

Ghost Images

Ghost images are blurred, magnified duplicates of radiopaque objects (such as earrings, necklaces, or cervical spine vertebrae) that appear on the opposite side of the image from their actual location. They are created when a dense object is located between the X-ray source and the center of rotation.

Troubleshooting: Remove all metallic jewelry, eyeglasses, hearing aids, and removable dental prostheses before exposure. Ensure the patient’s cervical spine is straightened (chin slightly tucked) to minimize vertebral ghost images.

Patient Positioned Too Far Forward or Back

When the patient’s anterior teeth are positioned too far forward relative to the focal trough, they appear narrowed and blurred. If positioned too far back, the anterior teeth appear widened and magnified.

Troubleshooting: Use the bite guide and light positioning indicators on the panoramic unit. Ensure the patient bites the notch on the bite block with their upper and lower incisors edge-to-edge. Follow the manufacturer’s positioning protocol carefully.

Digital Sensor Artifacts

Digital imaging systems introduce their own category of artifacts that are distinct from those seen with traditional film.

Dead Pixels and Lines

CCD and CMOS digital sensors can develop dead or stuck pixels that appear as consistent black or white spots on every image. Damaged sensors may also show lines or bands across the image.

Troubleshooting: Run the sensor’s built-in calibration tool if available. If dead pixels or lines persist, the sensor may need professional repair or replacement. Handle sensors carefully to prevent damage — never drop, bend, or crush them.

Cable and Connection Issues

Damaged USB cables or loose connections can produce intermittent artifacts including image noise, partial image capture, or complete image failure. These issues may be mistaken for sensor damage.

Troubleshooting: Inspect the cable for visible damage, especially near the sensor housing where strain is greatest. Try a different USB port. If using a USB hub, connect directly to the computer instead. Replace cables that show signs of wear.

Phosphor Plate (PSP) Artifacts

Phosphor storage plates present their own unique artifact challenges.

Residual Image (Double Exposure)

If a PSP plate is not fully erased before reuse, a faint ghost of the previous exposure can appear superimposed on the new image. This is one of the most common PSP artifacts.

Troubleshooting: Always erase PSP plates on a light box or in the scanner’s erase cycle before each use. If plates have been stored for an extended period, erase them before first use to clear any accumulated background radiation exposure.

Scratches and Surface Damage

PSP plates are delicate. Scratches on the phosphor surface appear as fine white lines on the processed image. These artifacts are permanent and worsen over time.

Troubleshooting: Handle plates by the edges only. Use protective barrier envelopes during intraoral placement. Inspect plates regularly and retire any that show visible surface damage. PSP plates have a finite lifespan — most manufacturers recommend replacement after a set number of scan cycles.

Exposure Setting Errors

Incorrect exposure parameters produce images that are too dark (overexposed) or too light (underexposed). While digital systems offer some latitude for post-processing adjustment, severely over- or underexposed images cannot be salvaged.

Troubleshooting: Follow manufacturer-recommended exposure charts based on patient size and anatomy. Adjust kVp and mA settings appropriately for pediatric versus adult patients and for anterior versus posterior regions. Maintain a reference chart at each X-ray unit and train all operators on proper technique selection.

Building a Quality Assurance Program

The best approach to artifacts is prevention. Implement a quality assurance (QA) program that includes regular equipment testing, staff training, and image quality audits. Periodically review rejected images to identify patterns — if the same type of artifact recurs, it points to a systematic issue with technique, equipment, or training that can be addressed proactively.

By understanding the causes behind common dental X-ray artifacts, your team can minimize retakes, reduce unnecessary radiation exposure, and ensure that every image captured provides maximum diagnostic value.

CBCT vs. Traditional Dental X-ray: When to Use Which Technology

Dental imaging technology has evolved dramatically over the past two decades. While traditional two-dimensional X-ray remains the backbone of dental diagnostics, cone beam computed tomography (CBCT) has emerged as a powerful three-dimensional imaging modality that is transforming treatment planning across multiple specialties. Understanding when each technology is appropriate is essential for delivering optimal patient care while managing radiation exposure and costs.

What Is Traditional Dental X-ray?

Traditional dental X-ray encompasses several well-established imaging techniques that produce two-dimensional images. The most common types include periapical radiographs, bitewing radiographs, and panoramic radiographs (orthopantomograms). These modalities have been the standard of care for decades and remain indispensable for routine diagnostic tasks.

Periapical X-ray images capture the entire tooth from crown to root apex, making them ideal for evaluating individual teeth, detecting periapical pathology, and assessing root morphology. Bitewing radiographs excel at revealing interproximal caries and monitoring alveolar bone levels. Panoramic radiographs provide a broad overview of the entire dentition, jaws, temporomandibular joints, and surrounding structures in a single image.

What Is CBCT?

Cone beam computed tomography uses a cone-shaped X-ray beam that rotates around the patient’s head, capturing hundreds of projection images in a single scan. Sophisticated software reconstructs these projections into a three-dimensional volumetric dataset that clinicians can navigate in axial, sagittal, and coronal planes — plus generate cross-sectional slices at any angle.

CBCT scanners designed for dental use typically feature smaller field-of-view (FOV) options, faster scan times, and lower radiation doses compared to medical CT scanners. However, the radiation dose from even a small-FOV CBCT scan is significantly higher than that of a standard periapical or panoramic X-ray.

When Traditional X-ray Is the Right Choice

For the vast majority of routine dental examinations, traditional X-ray remains the appropriate first-line imaging modality. The following scenarios are well-served by conventional radiography:

  • Caries detection: Bitewing radiographs remain the gold standard for detecting interproximal caries. Their high spatial resolution and low radiation dose make them ideal for periodic screening.
  • Periodontal assessment: Bitewings and periapical X-ray images effectively demonstrate alveolar bone levels and can track periodontal disease progression over time.
  • Routine endodontic evaluation: Periapical radiographs provide excellent detail for initial endodontic diagnosis, working length determination, and post-treatment follow-up in straightforward cases.
  • General screening: Panoramic X-ray offers an efficient overview for new patient evaluations, orthodontic assessment, and third molar evaluation.
  • Post-operative checks: Following routine restorative or surgical procedures, traditional X-ray is typically sufficient for monitoring healing.

Traditional X-ray benefits from lower cost per image, widespread availability, faster acquisition, and — most importantly — substantially lower radiation doses. The ALARA principle (As Low As Reasonably Achievable) demands that clinicians choose the lowest-dose imaging modality that can answer the clinical question.

When CBCT Is the Better Option

CBCT should be considered when two-dimensional imaging cannot provide the diagnostic information needed for safe and effective treatment. Key indications include:

  • Implant planning: CBCT provides precise measurements of bone height, width, and density at the proposed implant site. It also reveals the exact location of critical anatomical structures like the inferior alveolar nerve canal, mental foramen, and maxillary sinus floor.
  • Complex endodontics: Cases involving unusual root canal anatomy, suspected vertical root fractures, or resorptive lesions benefit enormously from three-dimensional visualization. CBCT can reveal additional canals that are invisible on periapical X-ray.
  • Impacted teeth: When panoramic X-ray suggests a close relationship between an impacted third molar and the inferior alveolar nerve, CBCT clarifies the precise spatial relationship and guides surgical planning.
  • Pathology evaluation: Large or complex jaw lesions, cysts, and tumors are better characterized with CBCT, which reveals their true three-dimensional extent and relationship to adjacent structures.
  • Orthodontic and orthognathic surgery planning: Complex cases benefit from three-dimensional cephalometric analysis and airway assessment that only CBCT can provide.
  • TMJ evaluation: CBCT offers superior visualization of bony components of the temporomandibular joint compared to panoramic X-ray.
  • Trauma assessment: Suspected jaw fractures, root fractures, and dentoalveolar trauma may require CBCT when conventional images are inconclusive.

Radiation Dose Considerations

Radiation dose is perhaps the most important factor in choosing between these technologies. A single periapical X-ray delivers approximately 1–8 microsieverts (µSv), while a full-mouth series delivers about 35–170 µSv. A panoramic X-ray typically delivers 10–25 µSv.

By comparison, a small-FOV CBCT scan delivers approximately 20–100 µSv, while a large-FOV CBCT scan can deliver 70–600 µSv or more, depending on the unit and exposure settings. This means a single large-FOV CBCT can deliver radiation equivalent to several full-mouth X-ray series.

Every CBCT scan should be clinically justified — there must be a specific diagnostic question that cannot be answered by lower-dose imaging. Routine use of CBCT for screening purposes is not supported by current evidence-based guidelines from organizations such as the American Dental Association, the American Academy of Oral and Maxillofacial Radiology, or the European Commission.

Cost and Workflow Implications

Beyond radiation, practices must consider the financial and workflow implications. CBCT units represent a significant capital investment, typically ranging from $70,000 to over $200,000. Ongoing costs include software licenses, maintenance contracts, and staff training. Traditional X-ray equipment is considerably less expensive to acquire and maintain.

CBCT scans also require more time for interpretation. A single CBCT volume may contain hundreds of slices, and the clinician is responsible for reviewing the entire volume — including areas outside the region of interest. Incidental findings in CBCT scans are common and must be documented and managed appropriately.

Making the Right Decision

The decision between CBCT and traditional X-ray should always be guided by the clinical question at hand. Start with the lowest-dose imaging modality that can provide the necessary diagnostic information. If two-dimensional imaging leaves unanswered questions that are critical to treatment planning, then CBCT is justified.

Document your clinical rationale for ordering any imaging study, especially CBCT. Ensure that staff operating CBCT equipment are properly trained, that the unit is regularly calibrated and maintained, and that appropriate quality assurance protocols are in place. With thoughtful application of both technologies, dental practices can deliver the highest standard of diagnostic care while respecting the principles of radiation safety.

Understanding Dental X-Ray Tube Maintenance: Why Preventive Care Extends Equipment Life

Dental x-ray equipment represents a significant capital investment for any practice, and the x-ray tube is its most critical — and most expensive — component. Understanding how these tubes work, recognizing early warning signs of failure, and implementing proper maintenance protocols can dramatically extend equipment life and prevent costly downtime.

Close-up of dental x-ray tube
The x-ray tube: your imaging system’s most critical component.

How Dental X-Ray Tubes Work

At its core, an x-ray tube is a vacuum tube designed to convert electrical energy into x-ray radiation. Understanding the basic physics helps explain why maintenance matters so much.

The Cathode

The cathode assembly contains a tungsten filament — similar in concept to an old incandescent light bulb, but engineered for extreme precision. When heated by electrical current, the filament releases electrons through thermionic emission. A focusing cup surrounds the filament, shaping the electron stream into a narrow beam directed at the anode.

Most dental tubes use a dual-filament cathode: a small filament for fine-detail work (periapical images) and a larger filament for broader exposures (panoramic). The filament you select determines the focal spot size — the area on the anode where electrons strike, which directly affects image resolution.

The Anode

The anode (or target) is where the magic happens — and where most of the punishment occurs. Electrons from the cathode slam into the anode’s tungsten target at tremendous speed. Only about 1% of that kinetic energy converts to x-rays; the remaining 99% becomes heat.

In dental intraoral units, you’ll typically find stationary anodes — a tungsten target embedded in a copper block that acts as a heat sink. Panoramic and CBCT units often use rotating anodes, where the tungsten disc spins at 3,000–10,000 RPM to distribute heat across a larger surface area.

The Focal Spot

The focal spot is the area on the anode where the electron beam strikes. A smaller focal spot produces sharper images but concentrates heat in a smaller area, accelerating wear. Dental intraoral tubes typically have focal spots of 0.4–0.7 mm, while panoramic units may use 0.5–1.0 mm spots.

The line-focus principle allows manufacturers to use an angled anode face to create an effective focal spot smaller than the actual area being bombarded — a clever engineering compromise between image quality and heat management.

Common Failure Modes

X-ray tubes don’t fail randomly. They wear out through predictable mechanisms, and understanding these helps you spot trouble early.

Anode Pitting and Roughening

Over thousands of exposures, the tungsten surface of the anode develops microscopic pits and roughness. This is the most common form of tube aging. As the surface degrades:

  • X-ray output becomes less uniform
  • Image contrast gradually decreases
  • Heat dissipation becomes less efficient, accelerating further damage
  • In severe cases, tungsten particles can vaporize and coat the glass envelope, causing electrical arcing

What accelerates it: Excessive exposure settings, inadequate warm-up, and exceeding duty cycle ratings. Making high-mA exposures on a cold tube is particularly destructive — thermal shock can crack the anode surface.

Bearing Wear (Rotating Anode Units)

Rotating anode tubes in panoramic and CBCT units rely on precision bearings operating in a vacuum — one of the most demanding bearing applications in any industry. These bearings:

  • Cannot be conventionally lubricated (vacuum environment)
  • Operate at extreme temperatures
  • Must maintain precise balance at thousands of RPM

As bearings wear, you may notice increased vibration, longer spin-up times, or audible changes in the rotor sound. Eventually, bearing failure causes the anode to wobble, producing image artifacts or complete tube failure.

Filament Degradation

The cathode filament thins over time as tungsten evaporates during each heating cycle. This causes:

  • Gradual decrease in tube output at the same technique settings
  • Changes in focal spot size (usually getting larger)
  • Eventually, filament breakage and complete failure

Insulation Breakdown

The tube housing contains oil that serves dual purposes: electrical insulation and heat dissipation. Over time:

  • Oil can degrade, reducing its insulating properties
  • Gas bubbles can form, creating paths for electrical arcing
  • Seals can deteriorate, leading to oil leaks
  • The glass envelope can develop micro-cracks from thermal cycling

Insulation failures often present as intermittent problems — the unit works sometimes but not others, or produces inconsistent output.

Warning Signs: What to Watch For

Catching tube problems early can mean the difference between a planned replacement and an emergency failure that disrupts patient care.

Image Quality Degradation

  • Gradually decreasing contrast — images look “flat” or “washed out” compared to previous quality
  • Increased noise/graininess — especially at settings that previously produced clean images
  • Loss of fine detail — particularly in periapical images where you need to see root canal anatomy and lamina dura
  • Uneven density — one side of the image consistently lighter or darker than the other

Unusual Sounds

  • Grinding or rumbling during rotor spin-up (panoramic/CBCT units) — bearing wear
  • Clicking or snapping — possible electrical arcing inside the tube housing
  • Changes in the normal operating sound — any new sound warrants investigation

Intermittent Exposure Failures

  • Unit fires sometimes but not others
  • Exposures that terminate prematurely
  • Error codes appearing sporadically
  • Unit requiring longer prep time before firing

Important: Intermittent problems almost always get worse, never better. Don’t ignore them hoping they’ll resolve on their own.

Physical Signs

  • Oil stains or residue around the tube housing
  • Unusual heat from the tube head after normal workload
  • Discoloration of the tube housing
Technician maintaining dental x-ray equipment
Regular professional maintenance extends tube life and ensures diagnostic quality.

Preventive Maintenance Best Practices

A structured maintenance program protects your investment and ensures consistent diagnostic quality for your patients.

Daily: Warm-Up Protocols

This is the single most impactful habit you can develop. Before the first patient exposure each day:

  1. Make 2–3 low-technique exposures before clinical use. Start at approximately half your normal mA and kVp settings.
  2. Gradually increase to normal operating parameters.
  3. Wait 30 seconds between warm-up exposures to allow heat dissipation.

Why this matters: A cold anode subjected to full-power exposure experiences severe thermal shock. The rapid, uneven heating can cause surface cracking and dramatically shorten tube life. The warm-up protocol brings the anode to operating temperature gradually.

For units that have been idle for a weekend or longer, extend the warm-up to 4–5 exposures with longer intervals.

Daily/Weekly: Duty Cycle Awareness

Every x-ray tube has a duty cycle rating — the maximum ratio of exposure time to total time. Exceeding it causes heat buildup that accelerates every failure mode discussed above.

  • Know your tube’s rating and monitor your usage patterns
  • Space exposures appropriately — allow cooling time between patients during busy periods
  • Monitor the tube head temperature — if it’s noticeably hot to the touch, you’re pushing the duty cycle
  • Full mouth series (FMX) are particularly demanding — consider taking a brief pause midway through

Monthly: Visual Inspection

  • Inspect the tube head for oil leaks, unusual discoloration, or physical damage
  • Check all cables and connections for wear or damage
  • Verify that positioning arms move smoothly and lock securely
  • Confirm that all indicator lights and displays function correctly

Quarterly: Quality Assurance Testing

Regular QA testing catches degradation before it affects clinical images:

  • Output consistency testing: Use a dosimeter to verify that exposure output is consistent and within manufacturer specifications
  • kVp accuracy: Verify with a kVp meter that actual output matches selected settings
  • Timer accuracy: Confirm that exposure times match selected values
  • Collimation check: Verify that the beam is properly collimated and aligned
  • Image quality phantoms: Use a standardized phantom to objectively assess resolution, contrast, and uniformity over time

Keep a log of all QA results. Trending data is far more valuable than individual measurements — a gradual decline in output that’s still within spec tells you a tube is aging and helps you plan replacement proactively.

Annual: Professional Service

  • Schedule annual service visits with a qualified x-ray equipment technician
  • Full electrical safety testing including leakage radiation measurements
  • Calibration verification with certified test equipment
  • Oil condition assessment for tube housing integrity
  • Regulatory compliance review — ensure your equipment meets current state and federal requirements

When to Replace vs. Repair

Tube replacement is expensive, but so is poor image quality and equipment downtime. Consider replacement when:

  • Output has decreased more than 15–20% from baseline despite normal technique settings
  • Image quality issues persist after all other variables (processing, sensor, positioning) have been ruled out
  • Intermittent failures are increasing in frequency
  • The tube has reached the manufacturer’s estimated exposure count or age limit
  • Repair costs approach 50% or more of replacement cost

The Bottom Line

X-ray tube maintenance isn’t glamorous, but it directly impacts both your practice’s bottom line and your patients’ diagnostic care. A tube that’s properly warmed up daily, operated within its duty cycle, monitored with regular QA testing, and professionally serviced annually can last significantly longer than one that’s neglected.

The investment in preventive maintenance is minimal compared to emergency tube replacement — both in direct costs and in the disruption to patient care. Build these practices into your daily routine, and your equipment will reward you with years of reliable service.

Have questions about your specific x-ray equipment maintenance needs? Contact your equipment manufacturer’s service department or a qualified dental x-ray technician for guidance tailored to your setup.